
How anyone can build a scalable web scraper in Python
Scrape valuable datasets for your industry using basic Python skills


Web scraping in practice can get complicated quickly.
You’ll likely encounter multiple roadblocks like CAPTCHAs, IP blocking, dynamic (Java-based) web pages, and more. These obstacles can deter even the most seasoned Python coders. Your code might become overly complex, and you could ultimately fail to obtain that sought-after dataset that could elevate your analysis.
You can bypass all this complexity with a third-party tool called ScraperAPI and some basic Python skills. It allows you to build a fully functional web scraper from scratch in less than an hour.
ScraperAPI handles the heavy lifting in the background, so you can scrape almost any web page with minimal fuss. You can crawl e-commerce sites (Amazon and eBay), housing market platforms (Zillow and Redfin), job portals (LinkedIn and Indeed), and more.
Today’s guide will help you go from complete newbie to the go-to web scraping expert at work.
Here’s what we’ll cover:
Why use ScraperAPI and Python?
The basic workflow applied to Amazon product pages
Scraping datasets from a search query URL on popular sites like Amazon and Redfin [Bonus for paid subscribers]
Autonomous Econ is a newsletter that empowers economists and data analysts with easy-to-follow Python tutorials that deliver big results.
Subscribe and join 4k+ others to work smarter through automation and become a savvier analyst.
Get access to my Python for Econ Starter Pack site when you sign up. It includes my favorite educational resources for Python applications like dashboards, machine learning, web scraping, and generative AI.
(1) Why use ScraperAPI and Python?
I wrote an earlier post covering the fundamentals of web scraping using the requests and BeautifulSoup libraries. While this approach works fine for basic, static HTML websites, it struggles with modern Java-based dynamic websites.
Web Scraping Demystified

Extracting data from web pages is a valuable skill when you’re struggling to get data from official sources, or if you simply want to automate manual data collection.
There are open-source libraries, like Selenium, to handle modern websites. This library can interact with websites like a real user to access the information you need.
I once used Selenium with Python to track petrol prices from gas station websites in my local area. However, it required a lot of setup, had a steep learning curve, and wasted time that could have been spent on analysis and reporting.
ScraperAPI is a service designed to handle these dynamic web pages, allowing you to skip the technical setup and simply provide a URL.
Other benefits include:
Efficiently bypassing CAPTCHAs and anti-bots.
Suitable for both small and large-scale scraping tasks.
Smart rotating proxies (to prevent your IP from being blocked).
The free tier provides 1,000 API credits per month, which is sufficient for small projects. The next tier is inexpensive if you want to scale further.
ScraperAPI also offers low-code solutions to set up the scraping, but it's best to access the service via Python. This gives you the flexibility to use other Python libraries and integrate and automate your model and report workflows.
(2) The basic workflow
Here is the general workflow you can use for most websites.
Set up the work environment
Create a virtual Python environment in a code editor.
You’ll need to install the following libraries in your environment:
pip install requests beautifulsoup4 python-dotenvAdd your API key
First, set up a free ScraperAPI account, then go to the dashboard and copy your API key.
Create a .env file in the project root directory and store the API key like this:
SCRAPER_API_KEY="<APIKEY>"Never commit or push this file to a public repository like GitHub.
Import the libraries and load the API key
Create a new Python file, e.g., with a name like scrape.py. Import the libraries we installed earlier and load the API key from the .env file.
import os
import requests
from bs4 import BeautifulSoup
from dotenv import load_dotenv

load_dotenv()
api_key = os.getenv("SCRAPER_API_KEY")

...
In the payload object, we set the parameters for the scraping task. If you're unsure about how many credits are needed to scrape the desired URL, you can start with 1. If it fails, keep increasing it until it’s successful. The session parameter is useful if you want to maintain the same browser session for subsequent requests (persisting cookies, local storage, etc.).
...
payload = {
    "api_key": api_key,
    "url": "<URL_TO_SCRAPE>",
    "render": "true", # render a Javascript page
    "max_cost": "5", # limit on API credits to use
    "session_number": "0", # maintains the same browser session
}
...
Now, we use these parameters in the request via the ScraperAPI service to retrieve the raw HTML and convert it into a structured soup object, making it easier to extract content.
...
# Make the request to get the raw html
r = requests.get("https://api.scraperapi.com/", params=payload)

# Parse the HTML with BeautifulSoup
soup = BeautifulSoup(r.text, "html.parser")
...
We can always see how many credits were actually used for the request by running:
print("Cost of request (API credits):", r.headers.get("sa-credit-cost"))The rest of the workflow is identical to my earlier post on web scraping.
You just need to examine the web page, right-click on the element you want, and select ‘Inspect’ to view the HTML element.


You can then enter these details into soup.find() to extract the element from the soup object and strip the text. AI coding assistants can easily write this part for you if you provide the HTML element.
...
# Look for the a-offscreen element which contains the complete price
 price_element = soup.find("span", class_="a-offscreen")

# Extract text
price = price_element.text.strip()
print(f"Product Price: {price}")
...
We can do the same for the review score:
...
# Extract the review score from the soup object
review_score_element = soup.find(
        "span", class_="a-size-base a-color-base", attrs={"aria-hidden": "true"}
    )

review_score = review_score_element.text.strip()
print(f"Review Score: {review_score}")
...
And the output should match the web page:
# Output:

Product Price: $254.96
Review Score: 4.6
Cost of request (API credits): 5
How to take it further…
You can see that the code is very minimal with this approach. You can extend it to scrape a search results page and then loop the request code over individual product URLs to build an entire dataset. You can also easily automate and schedule the scraper to and extract data at regular intervals.
Consider upgrading to a paid subscription and expensing it through your work—it's a great motivator for me to keep investing energy into these posts.
The core of my articles are free to read, but paid subscribers will occasionally get extra perks, including code templates for useful extensions and larger projects.
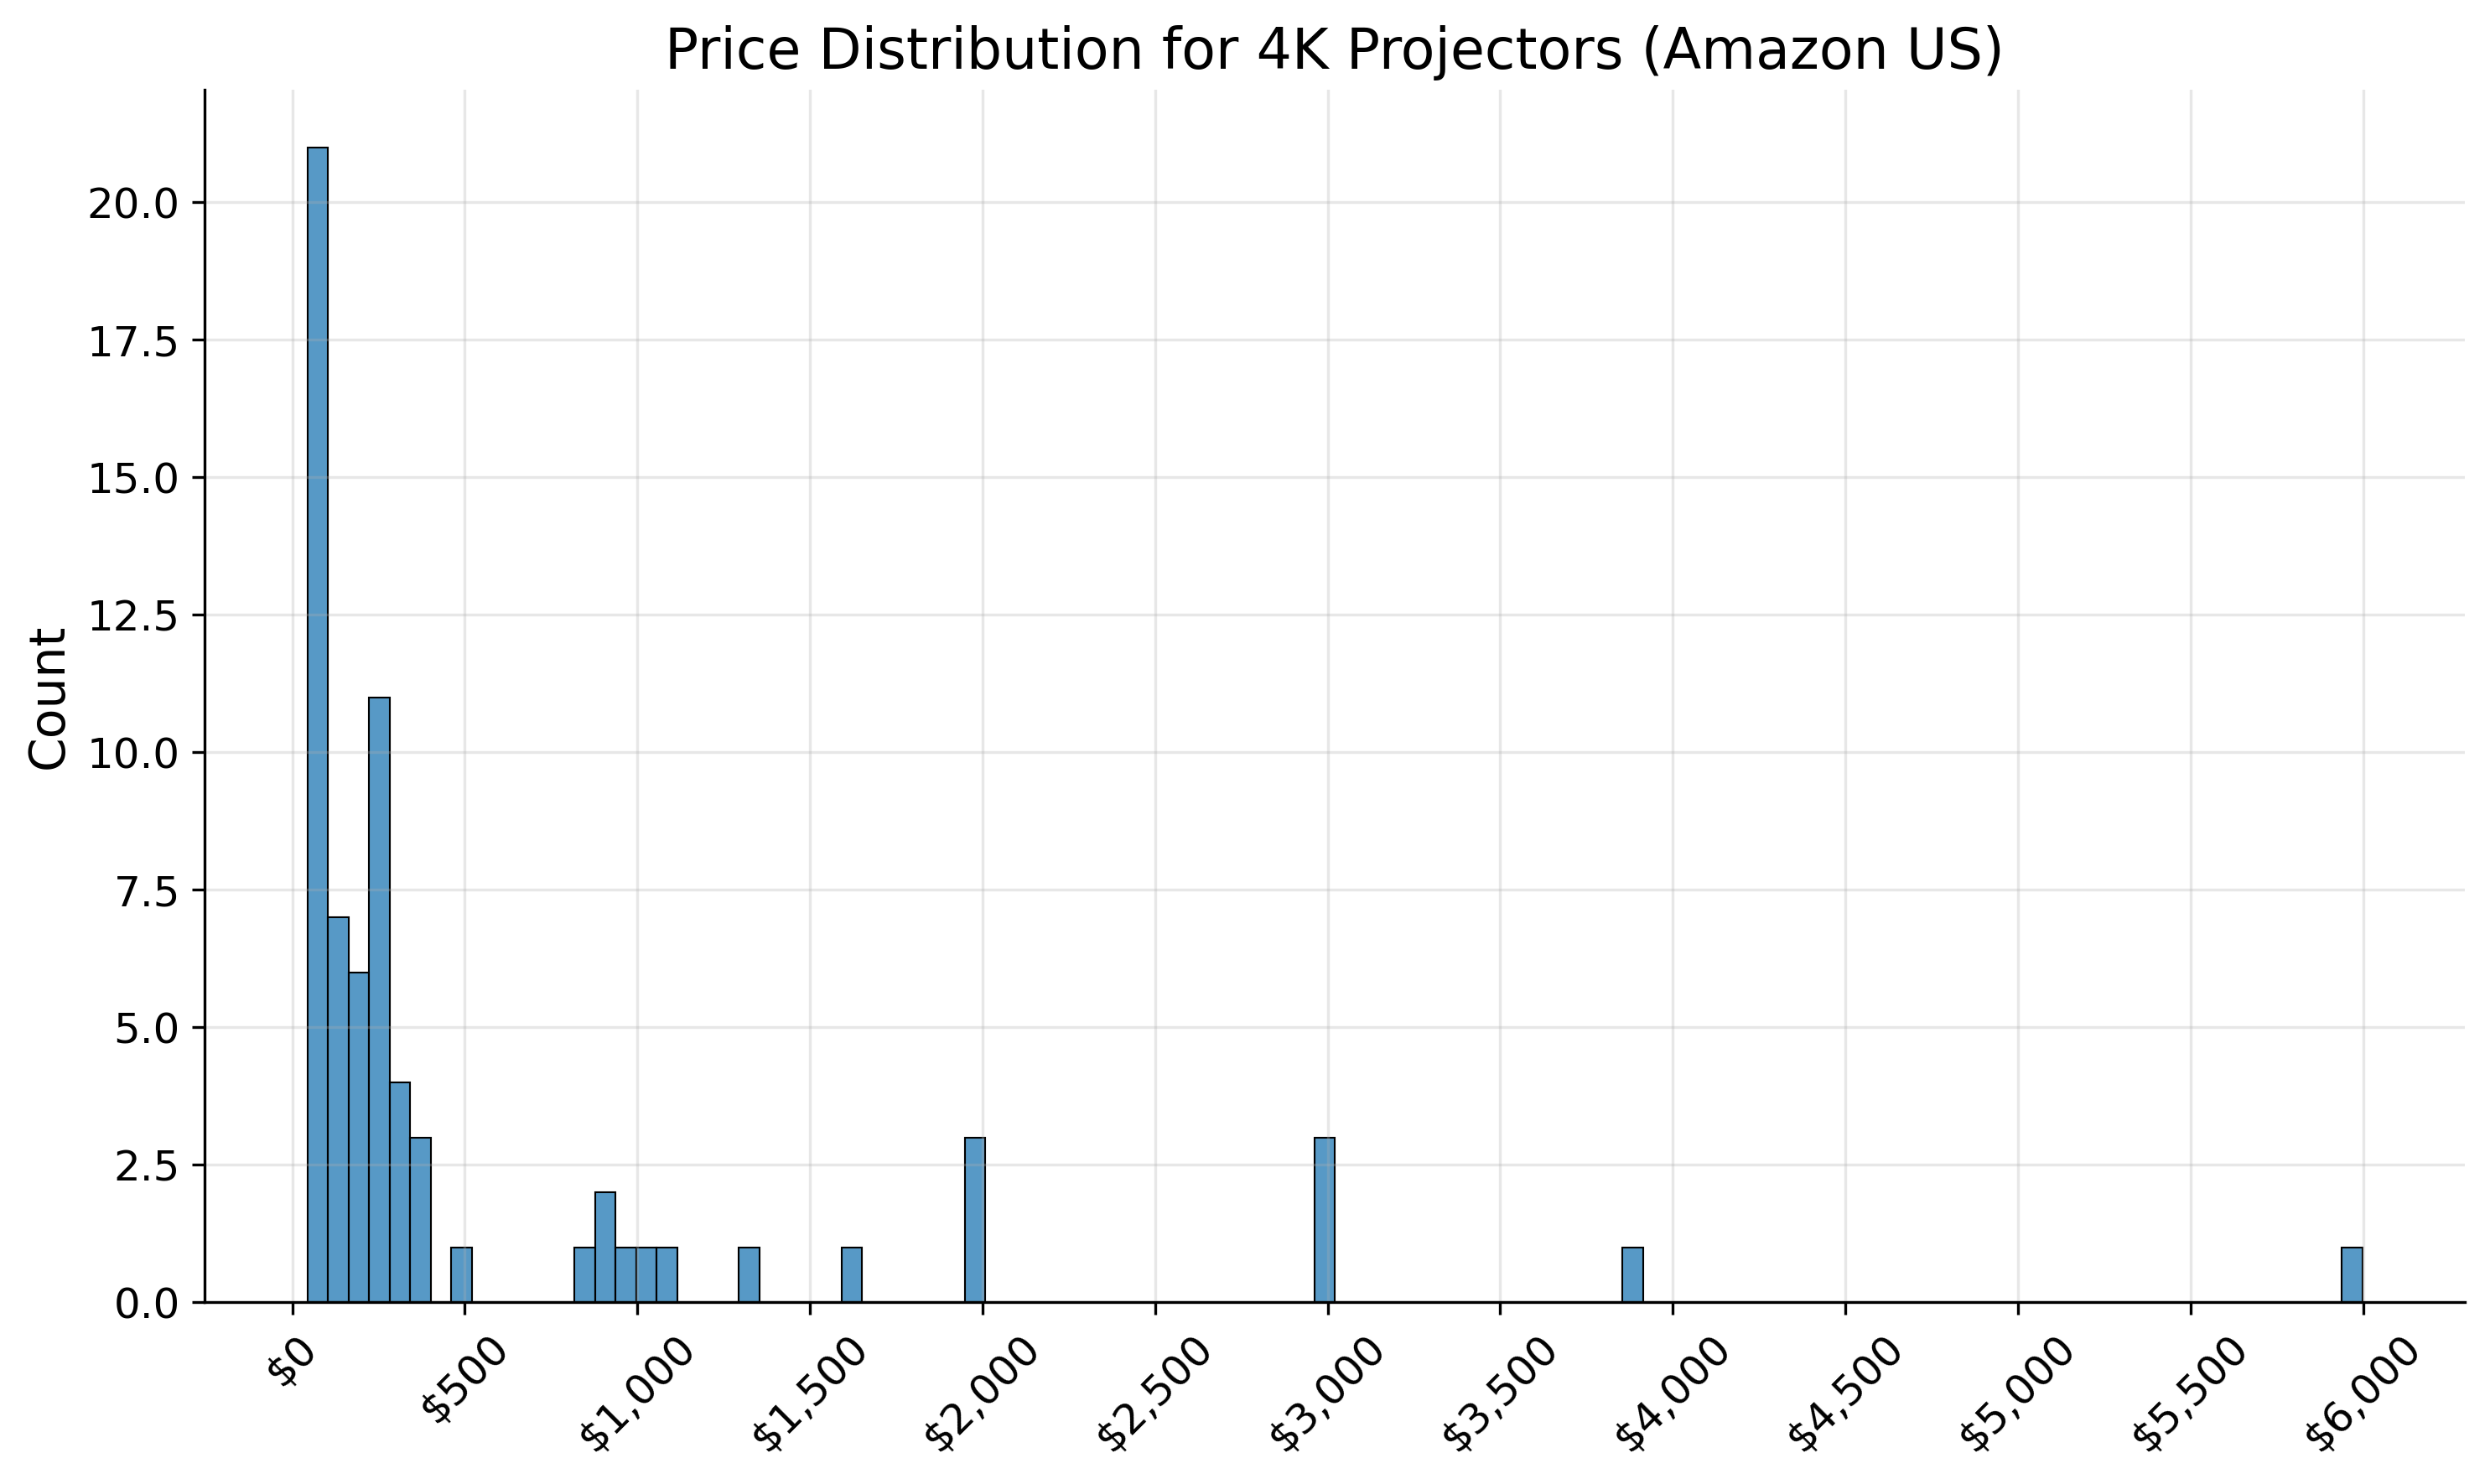
(3) Bonus code snippet: A hack to scrape datasets even faster from popular sites
There’s an even simpler way to build valuable datasets from popular sites like Amazon, Google (Search, Maps, News, Jobs, etc.), Walmart, Redfin, and eBay.
You don’t even need to use BeautifulSoup or inspect the HTML structure for the content you want to extract. You can simply provide a single search query URL and directly compile a dataset containing all the products from the query.
This is much more efficient and cost-effective than scraping every listing page individually.

Full code snippet…
Keep reading with a 7-day free trial
Subscribe to Autonomous Econ to keep reading this post and get 7 days of free access to the full post archives.